
One of our awesome, amazing, lovely family members got us a subscription to something really cool thing that I didn't even know existed. If you're homeschooling, you might love this, too. It's the Magic School Bus, Young Scientist Club.
We've been receiving their bubble-packed envelopes for most of a year, and I can now tell you that they are definitely worth it. If I were a little better at planning, I could organize our school schedule to focus on the topics in that month's Magic School Bus kit. They email in advance to let you know what the topic will be and what you will need in order to perform the experiments. Unfortunately, as I have detailed before, my life is a bit of a mess lately... sometimes it feels like an endless train wreck that I can do nothing to avoid, and just have to clean up after when the dust finally settles. So, there are envelopes we haven't opened and experiments we haven't done.
Some of the "experiments" aren't really... experimental. In one of our first envelopes, we got (among many other things) a card-stock print of a leg, cut in half at the knee, a couple of bits of string and a brass brad. We attached the two leg segments with the brad and taped the ends of the pieces of string so that one end attached to the lower half and one to the upper. I gather this was supposed to replicate the muscles moving the parts of the leg. As a biologist-in-training, I felt the need to explain that this was very simplified and... not really how this works. Still, it was a great conversation starter that resulted in education points that don't generally come up on their own.
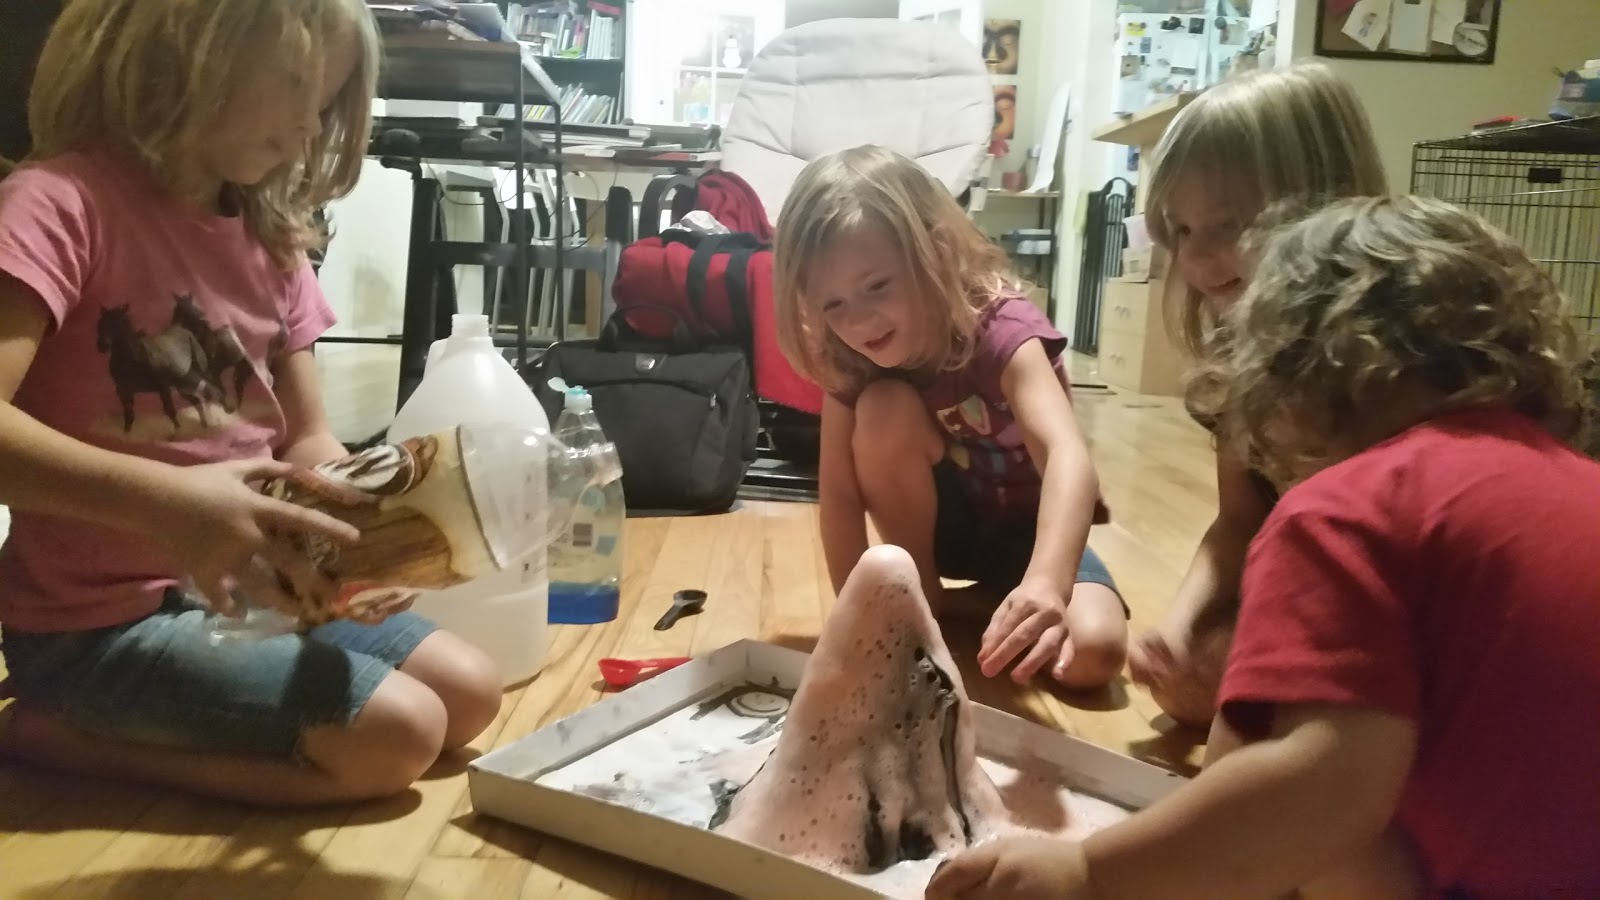
 My favorite so far was the most stereotypical science fair experiment ever: making and erupting a volcano. (obviously, there's a reason people love this one)
The instructions for the volcano experiment come in different phases. First, you build the structure with a small soda bottle and paper mache. The instructions are specific about what size of bottle, so you don't end up with a bottle too big for your solution to explode from. The kit doesn't include the bottle, but does come with tough construction paper to build your cone-shape and some powdered black paint. A lot of what you need comes from your kitchen: Flour, water and a bowl to make your paper mache, and vinegar, baking soda, red food coloring, soap and measuring cups/spoons for the "lava".
After you've built the volcano, your kids will slowly become more and more impatient before (maybe) just giving up all together, while you wait for it to dry completely before using it. It takes... days. You build it and you wait a long time... then you paint it and you wait another long time. Or at least that's how ours went. It's possible that my kids were overzealous with the mache and paint. They were incredibly excited about the project.

 But before you explode your volcano, you've got some work (read: learning) to do. I bet you thought you were just going to follow some directions with specific quantities and get the perfect, explosive solution. Not so fast. The Magic School Bus directions don't make it that simple. Instead, they tell you what to put in, but not how much, and give you a few different blank spaces to write out what you used each time so you can come up with the ideal solution on your own. (we used a camelback bottle for our preliminaries so the kids could see what was happening inside)
I think that was the best part. We talked about how baking soda and vinegar react with one another and explained that you could use that knowledge to figure out if you needed more baking soda or more vinegar. Take the puddle of already reacted mess and add a little baking soda to one area. Does it react a lot? Now add vinegar to another area. Does that react more or less?
We came up with our perfect solution and put it in our volcano. It was amazing, and even the Cub loved it. And with all of those mixture tests we did on the front room floor, the hardwood is super sanitary now.
No comments:
Post a Comment