Saturday, September 1, 2012

Fall Leaf Sun Catcher Project


Each season I like to do a project with my kids that I can hang up all season long. For Spring, I cut pieces of construction paper to look like parts of flowers (stem, leaf, petal, and to keep it simple, just a circle piece for the center) and let them make flowers, or not. The results were interesting.

C made flowers... basically as many as she could fit on her paper. S made an interesting abstract array of pieces that still looked fairly well thought out. M mostly got practice using a paintbrush to apply diluted glue to pieces of paper, so hers was a bit of a mess. They’ve hung on the freezer door ever since, because I find them so interesting.

In the summer, we painted bird houses. But now it’s fall and it’s time for something different. We made fall leaf sun catchers, and it was fun for my five-year-olds and easy enough that my two-year-old could make one of her own.

Things you need:

crayon shavings (sharpen some crayons to get nice, thin shavings)
waxed paper
black construction paper
leaf shape template (we used this one)
glue
scissors
iron (additionally, ironing board and towel)

How we did it:


1. Pick out colors - We let the kids help us choose colors for the leaves, after we talked about what happens to leaves in the fall. We tried to guide them toward picking colors that leaves might actually be by showing them pictures, since autumn colors haven’t really begun to show here. They chose brown, purple, red, orange, and yellow.

I got out five pinch bowls and let them help me choose three crayons from each color group to gather shavings from. These color-picking steps were fun and educational for my two-year-old as I don’t think she thinks much about how many different shades of purple there are.

2. Sharpen crayons - For this, we sent the kids to play. After letting them pick three of each color, we stuck ourselves with 15 crayons to sharpen, dropping the shavings into color-separate bowls. But we had time, and this is easily accomplished with two sets of grown-up hands and some conversation.

3. Print and cut a leaf template - This can be your first step if you want. I’m glad I did it after the crayon sharpening because cutting the leaf shape out with my x-acto knife made the pad of my thumb hurt a bit.

I used scissors to cut a square around the leaf template, with a bit of space between each point of the leaf and the edge of the paper. Then, using that square as a guide, I cut similar squares from black construction paper and waxed paper.

You will need two squares of construction paper, and two sheets of waxed paper, for every leaf.

Next, I used my X-acto knife to cut the leaf shape out of the center of the construction paper. Only cut the leaf shape out of the construction paper, not the waxed paper. You can use scissors, but I suggest using a simpler leaf shape than the one I provided if that is your plan. I started out thinking I was going to use scissors on my maple leaf with all of it’s wiggly lines. That... did not happen.

Tips - I recommend making your waxed paper squares bigger than your construction paper squares so the melted crayon doesn’t seep out of the edges. You can always trim it later. Also, use a clip of some kind to hold the waxed paper to the template while you cut it. Waxed paper is unruly and annoying in certain ways.

4. Scatter the colors - We brought the kids back for this, and did it on the ironing board, so we wouldn’t have to move it after they had arranged their colors. They sat on dining chair and scattered the colors they chose onto one piece of flat waxed paper, and spread them out how they wanted.

Tips - Don’t let one area get too thick with crayon shavings or it will take a long time to melt. Use the construction paper leaf cut-out as a guide to show your kids where the crayons shaving should be on the waxed paper, so they don’t end up disappointed that you can’t see all the yellow they put in the far corners.


Remember - Two waxed papers

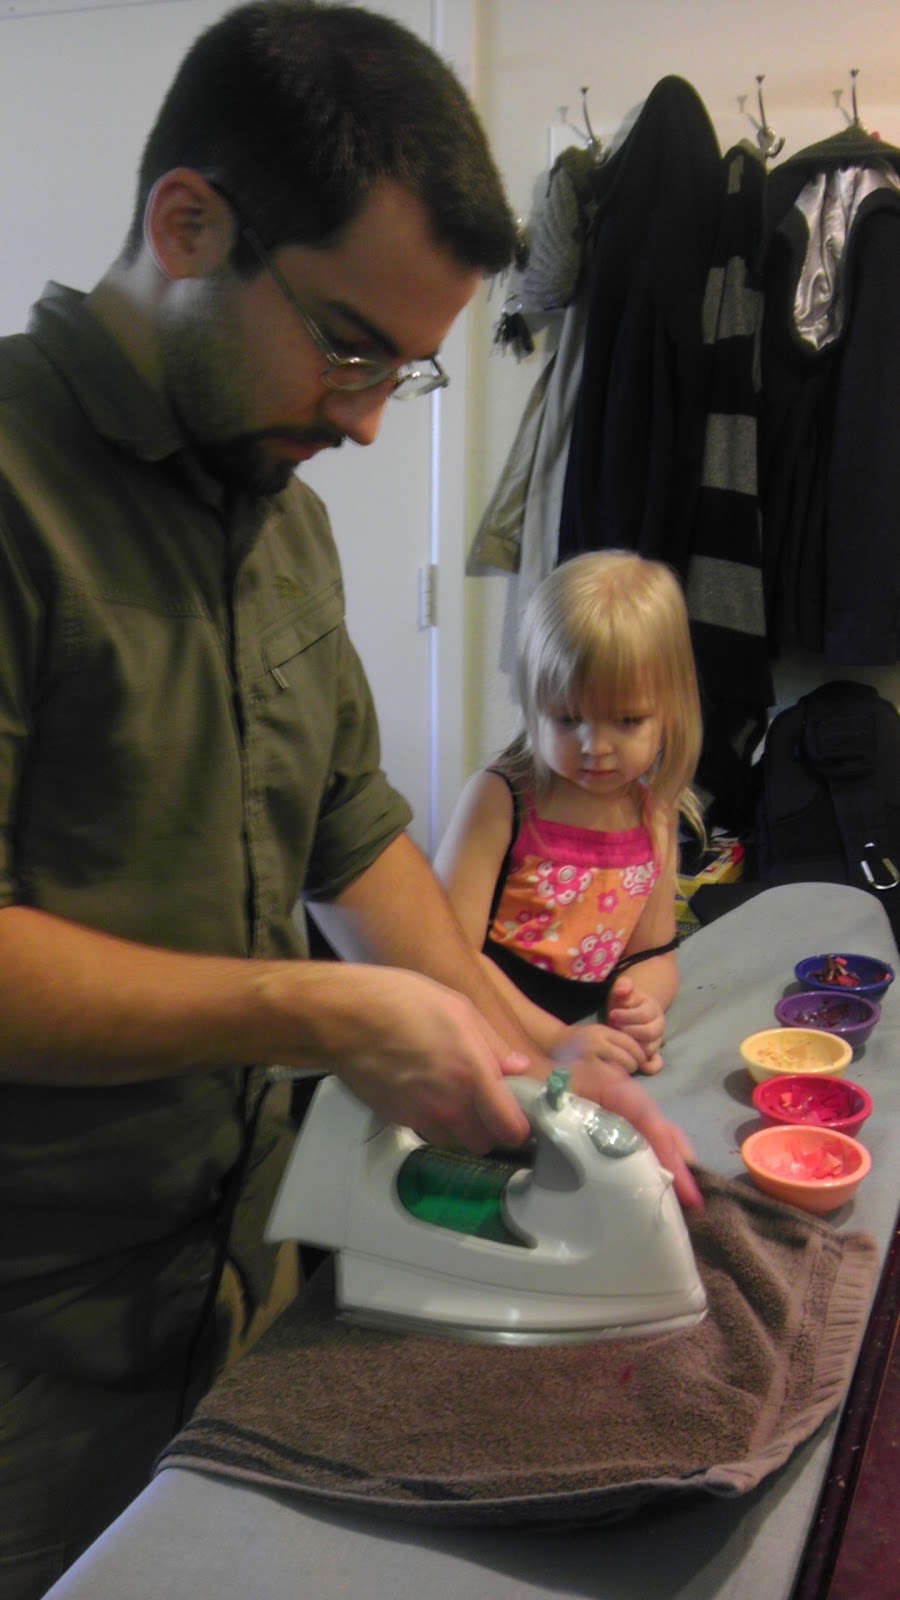
5. Sandwich and iron - This is grown-ups only. We let the kids watch, but at the other end of the ironing board. We placed the second square of waxed paper on top of the crayon shavings (now we have crayon shavings between two squares of waxed paper. If you don’t... redo step 4). Then, we carefully draped a hand towel that we didn’t particularly care about (incase it got wax on it) over the top, and ironed it.

We had our iron on a very low setting at first, but getting to warm the wax all the way through the towel was a bit of a chore. Turning it up to about a medium setting seemed to be just right. Test what works for you. It shouldn’t take more than a couple of minutes to melt all of the wax nicely.

6. Apply construction paper - Once the wax had dried back to a solid state (within a few minutes), we lined up the construction paper leaf cut-outs on either side of the wax paper by holding it up to the light to be sure we got them straight. Then I used clothespins to hold all of the pieces together in that position while I glued them.

You might be able to let your kids do this, but I wasn’t confident in my kids’ ability to be conservative with the glue. I dried them between books for the first few hours to make sure the paper didn’t ripple too much, so avoiding glue spills was important.

7. Trim - Once they were dry (or at least mostly dry), we trimmed the edges to make nice squares with no waxed paper showing. This is also something kids could do, with appropriate scissors of course, but mine are a bit crazy with the scissors and go overboard with excitement. So, grown-ups did this.


This project really didn’t take very long, and clean up was so easy. All of the mess (what little there was) was dry. Crayon shavings and paper trimmings were an easy fix. Then I just had to put the iron and ironing board away and toss the towel in the laundry. No messy kids, no glitter, no weird substances of questionable origin.


Thursday, August 30, 2012

Applesauce Oatmeal Muffins


These are excellent muffins for breakfast or for lunch on the go. They’re not too sweet, and they’re very moist. They might also make a great base for a cranberry oatmeal muffin if you add dried cranberries or something of that sort. If you want a bit more sweetness, you could try making extra topping.

Applesauce Oatmeal Muffins
Serves: 12
Total time: 30 minutes
Prep time: 10 minutes

Ingredients:

Muffins
1 ½ cups quick oats
1 ¼ cups flour
¾ tsp cinnamon
1 tsp baking powder
¾ tsp baking soda
1 cup unsweetened applesauce
½ cup milk
½ cup brown sugar
3 tbsps vegetable oil
1 egg white

Topping
¼ cup quick oats
1 tbsp brown sugar
⅛ tsp cinnamon
1 tbsp margarine or butter (melted)

Instructions:
  1. Heat oven to 400
  2. Line muffin tin with paper cups or spray with cooking spray
  3. Combine oats, flour, cinnamon, baking powder and baking soda
  4. Mix in applesauce, milk, brown sugar, oil and egg white until batter is consistent
  5. Fill muffin cups almost full - remember they will rise
  6. For topping combine remaining ingredients in small bowl (quick oats, brown sugar, cinnamon, melted margarine or butter)
  7. Sprinkle evenly over batter, press in slightly with finger
  8. Bake 20-22 minutes until deep golden brown and toothpick comes out clean
 Original recipe found at food.com with nutrition facts. Modifications made to instructions, based on my experience.

Saturday, August 25, 2012

A Day In The Life

We have a schedule... sort of.

If the kids aren’t already up by 7:45, I get them up because they absolutely must file through our single bathroom one-by-one before breakfast, which is at (or near) 8:00. Breakfast is usually just cereal. I’ve tried other things, but 8:00 am is not a good time for me to hear “I don’t like it” after I’ve just made applesauce pancakes, so I stick with what’s safe.

I try to have the dogs fed by 10:00 because I have to have lunch ready by 11:00. A result of feeding them cereal for breakfast: they’re hungry for lunch. The twins usually finish their lunch in 30 minutes or less, while the youngest sometimes takes over an hour. My favorite thing to make for lunch is turkey and cheese wrapped in crescent roll dough. They love it, and it’s fun. And I try to always offer a side of fruit. Of course, they also like corn dogs, mac and cheese, and pizza, but those things make me feel guilty, so I try to limit them.

Nap time is from 1:00 to 3:00, with some flexibility. It is required that they clean their room before they nap, so I assess the damage at around 12:00 to determine if the clean up will be a half or whole hour-long project. I also generally have to spend most of clean-up time in their room with them, keeping them on track and reminding the two-year-old where things go. But I don’t physically help.

The twins will soon be ditching naps, except on days when they've exhausted themselves in the morning. So, we'll probably utilize that time for more lessons.

Between 3:00 and 4:00, I take my dog out.

Lately, my partner has been on the “late” shift. He works for the school district, though, so that amounts to 8:00am to 4:00pm. The office is downtown, so he gets home between 4:30 and 4:45.

Dinner is as close to 6:00 as possible, and limited to 45 minutes. Our current favorite dinner food is tortilla soup.

After dinner, we fit in a bath, a second clean-up session, brushing teeth, and a story.

Bedtime is at 9:00.

It looks like this:
Click image to see larger version
I’m so glad that it counts as education when my kids ask me questions over dinner, or when they ask me to explain what something is during story time. Additionally, we manage to fit in math practice after dinner, to earn gummy bears or jelly beans for dessert. Still, sometimes I have to interrupt their play time to work with them on something. Otherwise, I’m not sure how I’d fit the required 4 hours (on average) into each day.

This post linked to iHomeschool's  *Not* back to homeschool blog hop
Not Back to School Blog Hop

Friday, August 24, 2012

Exciting News

We FINALLY got our ultrasound this morning. The girls were all excited to go see the baby, but almost totally lost interest after they saw what they wanted to see. My partner got a half-day off of work for it, so it was a room full of family.

Let me just get this out of the way: baby is healthy. All organs are normal, heart rate is perfect, growth is right on schedule... no complaints.

Also, it's a boy!

Boy and proud! This was the first thing he showed us.
He also has... substantial thighs like his daddy. In fact, based on his measurements, he's in the 78th percentile for his age.


And, to be clear, EVERYONE was excited. All three of my girls are excited to have a little brother and I've already been asked if they get to hold him "when he's out and healthy and... clean."

Wednesday, August 22, 2012

(not) Ultrasound

I had my intake appointment on the 14th, last Tuesday, at my new clinic. They sent various body fluids off to be tested, and we all got to listen to baby’s heartbeat. The nurse also explained that since I will be opting to have a C-Section (I have already had to have two, and don’t want to risk serious complications), and my due date is December 31st, they would normally want to schedule the surgery for 1 week in advance which would land me in the hospital for a couple of days starting on Christmas Eve. She reassured me that we could push it back a couple of days so I can be with my kids on Christmas. Poor Christmas baby.

The clinic scheduled my 20 week, detailed ultrasound for the 21st, which actually coincides with my 21st week of pregnancy. I know and accept that this is my fault, because I hesitated to start prenatal appointments, not wanting to figure out how to fit them into my still otherwise normal life. But when that day came around, my partner had taken the day off of work, we had gotten the kids up and breakfasted, we were all dressed, I had done my makeup and hair... and I got a call from the clinic.

They informed me that their ultrasound machine was down. This was fairly early in the morning, so I can only assume that whatever it was, it happened overnight. At that point, they said they were bringing in a specialist to have a look and try to fix it, but they weren’t sure how long that would take. They asked me to call back before I left the house for my appointment, to check on the progress.

They’re a small, comfortable clinic, so it’s not surprising that they apparently have only one machine. Also, I am thankful that they caught us before we walked out the door, even though the clinic is only 6 minutes away, by google’s estimate. It is considerate of them to call.

When I called back about an hour later, the repair tech had only been there for around 20 minutes and still didn’t know what the trouble was. This time, “I’ll call you back as soon as I know something.” is what she offered.

When she called, about 15 minutes before my scheduled appointment, she explained that the machine was still not functioning, and they would need to reschedule my appointment, “does Friday morning work for you?”

I hate to be one of those disgruntled clients who gets short with a representative on the phone who had nothing to do with the delay. Don’t shoot the messenger. But the first thing to cross my mind was, “my partner is going to have to get ANOTHER day off.” and the truth is I wasn’t sure that Friday WAS going to be okay, because I needed to discuss it with him first. Even then, we have to wait until he goes back to work to see if he can even have the time off. I’m sure all of that made me sound... exasperated. I know it wasn’t this nice lady’s fault.

But I rescheduled my appointment for Friday at 9:15 AM. My partner just confirmed that morning off. Hopefully things will be fully functional by then, and we’ll see what there is to see.

Monday, August 20, 2012

Introducing, My Homeschoolers

Click on the image to see a larger version

These are my homeschoolers. That’s S, on the left, C in the middle, and M on the right. S and C are five-years-old and are just starting a structured homeschool year. M is 2 and will be 3 soon. I make sure to keep worksheets and projects around for her, too. Wouldn’t want her to feel left out.

There is one huge advantage to having twins that has remained true for their entire lives thus far: They entertain each other. These days, that has allowed me some time to get my planner together, accumulate some worksheets, and do some research. But on the flip side of that is a problem.

They distract each other and rely on each other. When we’re doing lessons that involve me explaining anything for more than a minute, they find something funny in what I said and it can be hard to get them back on track. I’m sure other moms remember from their own childhood, how sleepovers got out of hand when it was time to go to sleep. If you have a friend laughing with you, it’s hard to stop. Then, if there’s a math problem or reading, S will wait for C to get the answer, and then jump on board with her, even when C is wrong, instead of working it out for herself. In that sense, it’s just like public school, except she’s not getting away with it for an entire school term and failing to learn anything for herself.

A couple of weeks ago, one of my kids asked why they’re not going to school. I explained (in so many words) that public schools often have 15, 20, maybe even 30 kids in a classroom with one teacher and that teacher has to keep up with all of those kids. The teacher’s job is to make sure that all of the kids understand each concept, and they’re limited to about 7 hours per day, and 4 or 5 days per week, so other kids are often working at the pace of those who are slower to grasp a lesson. And while I don’t expect to never have days or weeks or months when one of my kids is considerably behind another in a subject (even though they’re the same age), I do believe having only a few kids to look after, and having much more time available to me, allows me to make time to teach each one on her own level.

Yesterday, at Ikea, two different women directed this question at one of my five-year-olds, “are you in kindergarten?” The first time, the woman got a baffled look and a nervous smile, and I had to explain, “they’re homeschooled, and we just started, so they haven’t really figured out that not ‘GOING to school’ is still school.” The second time, my daughter proudly announced, “I’m homeschooled!” 

This post linked to iHomeschool's  *Not* back to homeschool blog hop
 Not Back to School Blog Hop

Saturday, August 18, 2012

Planners

I mentioned in my previous blog that I printed a planner. I spent one whole day on the process, which involved finding forms that worked for me, printing, copying, and filling out the pages, and putting the planner together. Granted, this would not have have taken nearly so long if I didn’t have many other obligations, but we’re working with whatever free time we can find, here.

To me, it’s a masterpiece. To anyone else, it’s a pinkish-purple binder full of paper. And, really, who uses binders? But I keep looking at it and thumbing through it with pride.

You can buy lesson planners. Book stores have them, or you can buy them online. There are lots of options on Amazon. That might work for you if you are a flexible person who doesn’t mind having to bend a bit to conform to the styling set out in a pre-printed book. Also, if you can make the time to review a few different versions and find the right one for you. I make that sound bad, but that’s only because I’m not that person.

If you’re not at all flexible, you can make your own. If you know how to use Excel (or something similar) or tables in Word, or any of a number of Adobe programs (I bet InDesign would be fun for this), you could organize and style your own planners from scratch. That, though, requires some time.

For those of us in between, there are great resources online. I want to be able to pick what kind of pages I include in my planner, how many, and how I organize them in my binder. I have most of a design degree, so I do know how to do this on my own, but I don’t really have time. So I’ll sacrifice a little personalization for the sake of being able to put it together in one day and no longer having to think about it.

I got my planner pages at http://donnayoung.org/forms/. This site has a short list of different sets available. Then, if you click on a set you like, then click “homeschool”, you can see the different pages available for that set. For instance, in the set I chose (Colonial, because I’m a sucker for script), you can choose from 9 different layouts for your planner, depending on what works for you.

My planner includes an attendance calendar, two sets of lesson plan pages (one for each kid, since one will have speech therapy and the other will not), and two reading lists. This year, it’s fairly simple. We’re not grading because I don’t have to report grades to the district yet. However, when that changes, there are grading tables available, too. And if I need more copies of, for instance, the reading list, I can just copy a blank page and not have to fill it out again. This works for me.

I’m pretty sure I’m not being biased at all when I say the planner I created is concise and easy to use. I have a dream in which I imagine family members being able to substitute teach and fill out the planner for me while the kids are on vacation with them. For some, though, that might be unrealistic.

As mentioned in the previous post, I’m currently compiling a list of resources I use for our lessons, as well as free/cheap field trip (or just for fun) destinations for families in Denver. If you have any suggestions for either list, let me know. I can always use more information.